Are you conducting an inspection with a colleague and want to easily include your colleague's name? For this, you can use the user element. This allows you to also set whether you want to automatically share the document with your colleague. Your colleague will then see the document listed under 'My Documents' as a shared document.
Adding a Colleague with the User Element
With the user element, you can easily load your colleague’s name during an inspection. You can also choose to automatically share the document with your colleague. The colleague will then see the document under My Documents as a shared document.
Table of Contents
-
Set the input method
1. Open a form
-
Open a new or existing form in the Form Builder.
2. Add the user element
-
Add the user element to your form.
-
The screen to edit the element will open automatically.
3. General settings
For general settings, please refer to another article.
4. Set the input method
-
Under Input method, you can choose whether the end user can select a user or if it is prefilled from the Form Builder.
-
You will see the following options:
-
User input
-
Read-only user
-
5. Additional options for user input
Read-only user
-
Select a user under User.
User input
-
Enter a placeholder text to help the end user understand what is expected.
-
Specify whether the element is required to fill in.
-
Limit the selection to users in the same teams as the end user, or leave this option off to allow selection from all users in the organization.
-
Choose whether to automatically share the document with the selected user.
-
[Proceed to step 8 for email options]
6. Share the document with a colleague
If you choose 'Read-only user,' you can select a user under 'User.'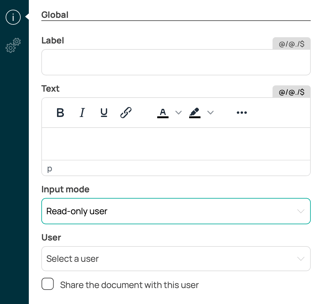
7. End user selects a user
If you choose 'User Input,' you will get a few extra options: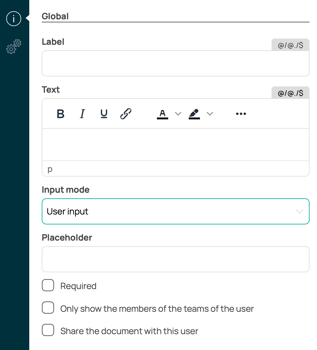
-
- You can provide a 'Placeholder': This is useful for the end-user to know what is expected of them.
- Specify whether the element is mandatory for the end-user to fill in.
- Specify whether the end-user can only select users who are part of the teams they belong to.
- If you leave this option off, the end-user can choose any user within the organization.
8. Send an email to the user
-
Choose to send an email to the selected user.
-
You can compose a message to be sent to the user.
-
You can also use aliases in the message.
9. Set an alias for reuse
-
Go to the Settings of the element.
-
Give the element an alias so the value can be reused in other forms later.
The End-User
When the end-user selects the element from the form during the inspection, they will see a list view with available users to select. The end-user can also search through the users.